
Practice Phlebotomy and Injection Techniques in a Real to Life Simulation way!
- Warnings:
Latex tubes – DO NOT USE if allergic to latex! - Contain sharp items like a needle – take great care to avoid needle-stick injuries
Instructions for Use of the Apprentice Doctor® Phlebotomy and Injection Techniques Pad :
1. Open box and unpack all items.
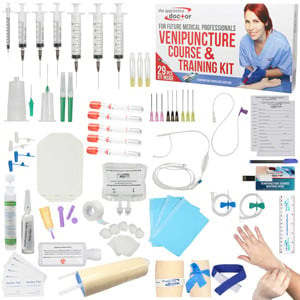
- Box contains:
- One Injection Pad
- Empty 200 ml IV bag (students will fill with saline)
- IV tube
- Connectors x 2
- 10 ml Syringe and needle
- Work surface cover
- Instructions for use (double sided color)
2. Prepare saline by adding 1 teaspoon of salt to one glass of lukewarm water – stir well.
3. Add red food colorant (optional).
4. Close both roller-clamps on the IV-bag tubes.

Figure 1: The setup phlebotomy/injection pad trainer
5. Fill the empty IV-bag by repeatedly – filling the syringe with the prepared saline and injecting it via the ‘in’ port at the top of the IV-bag up to the 200 – 250 ml mark.
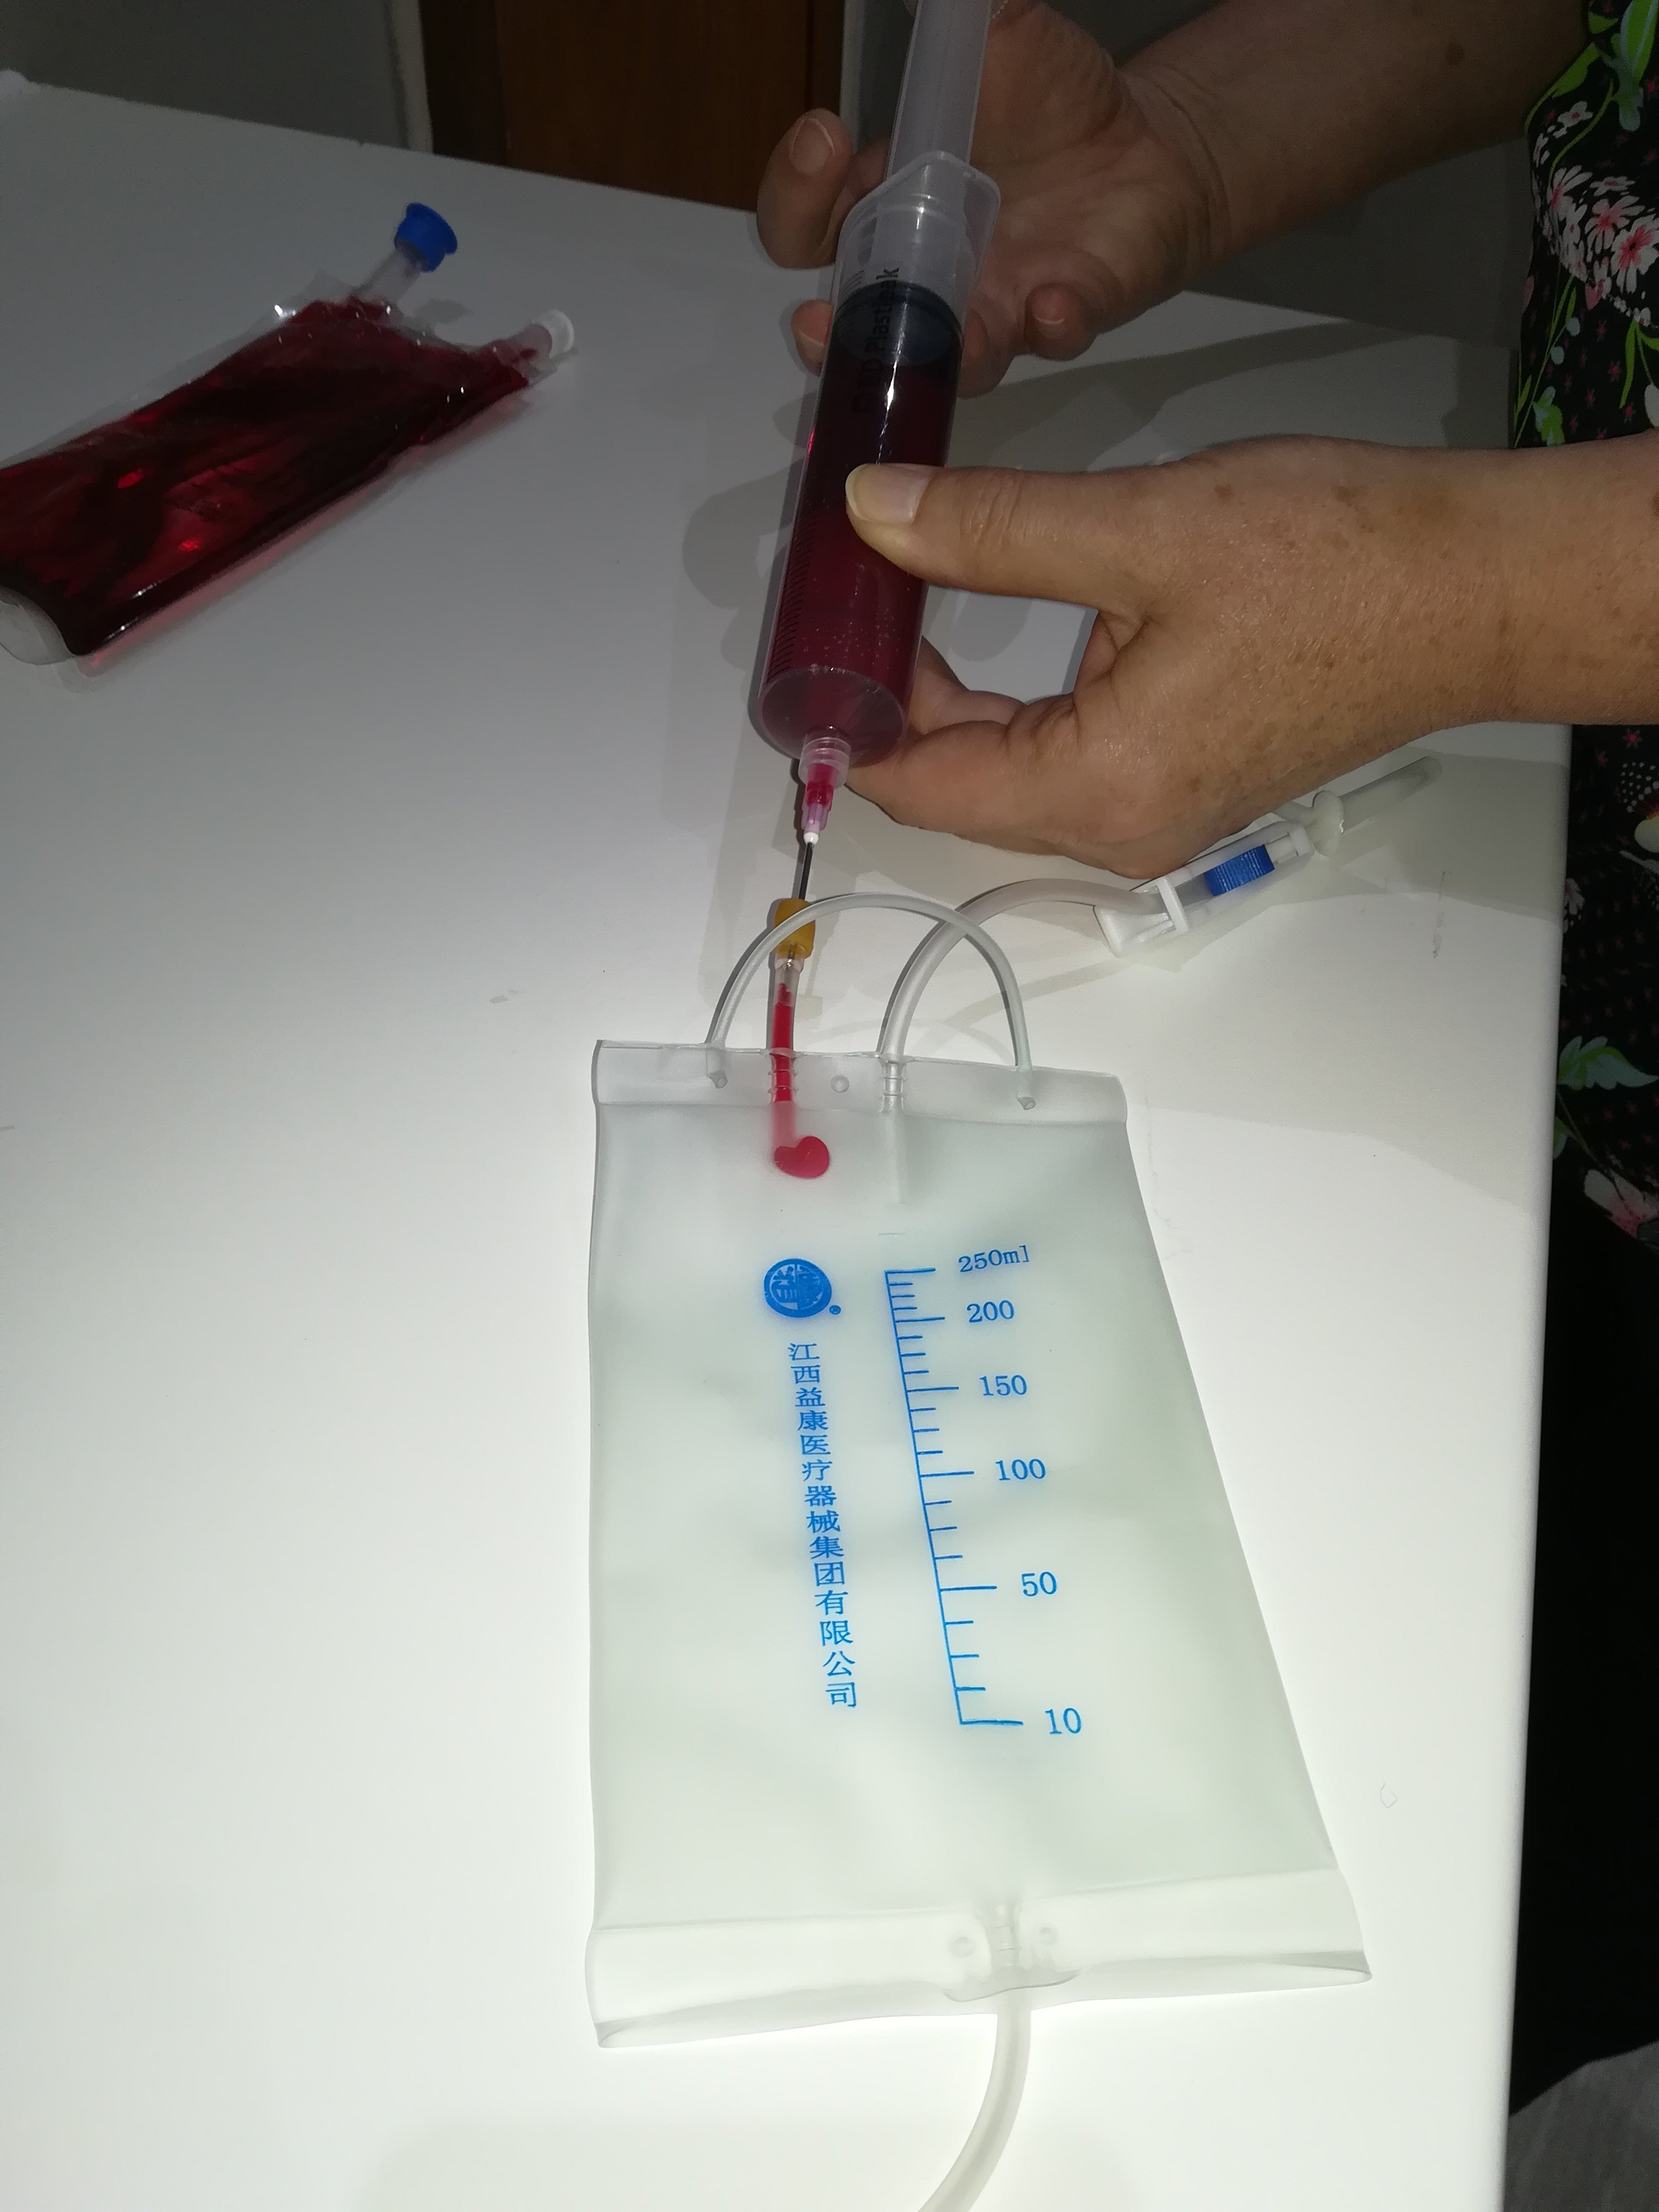
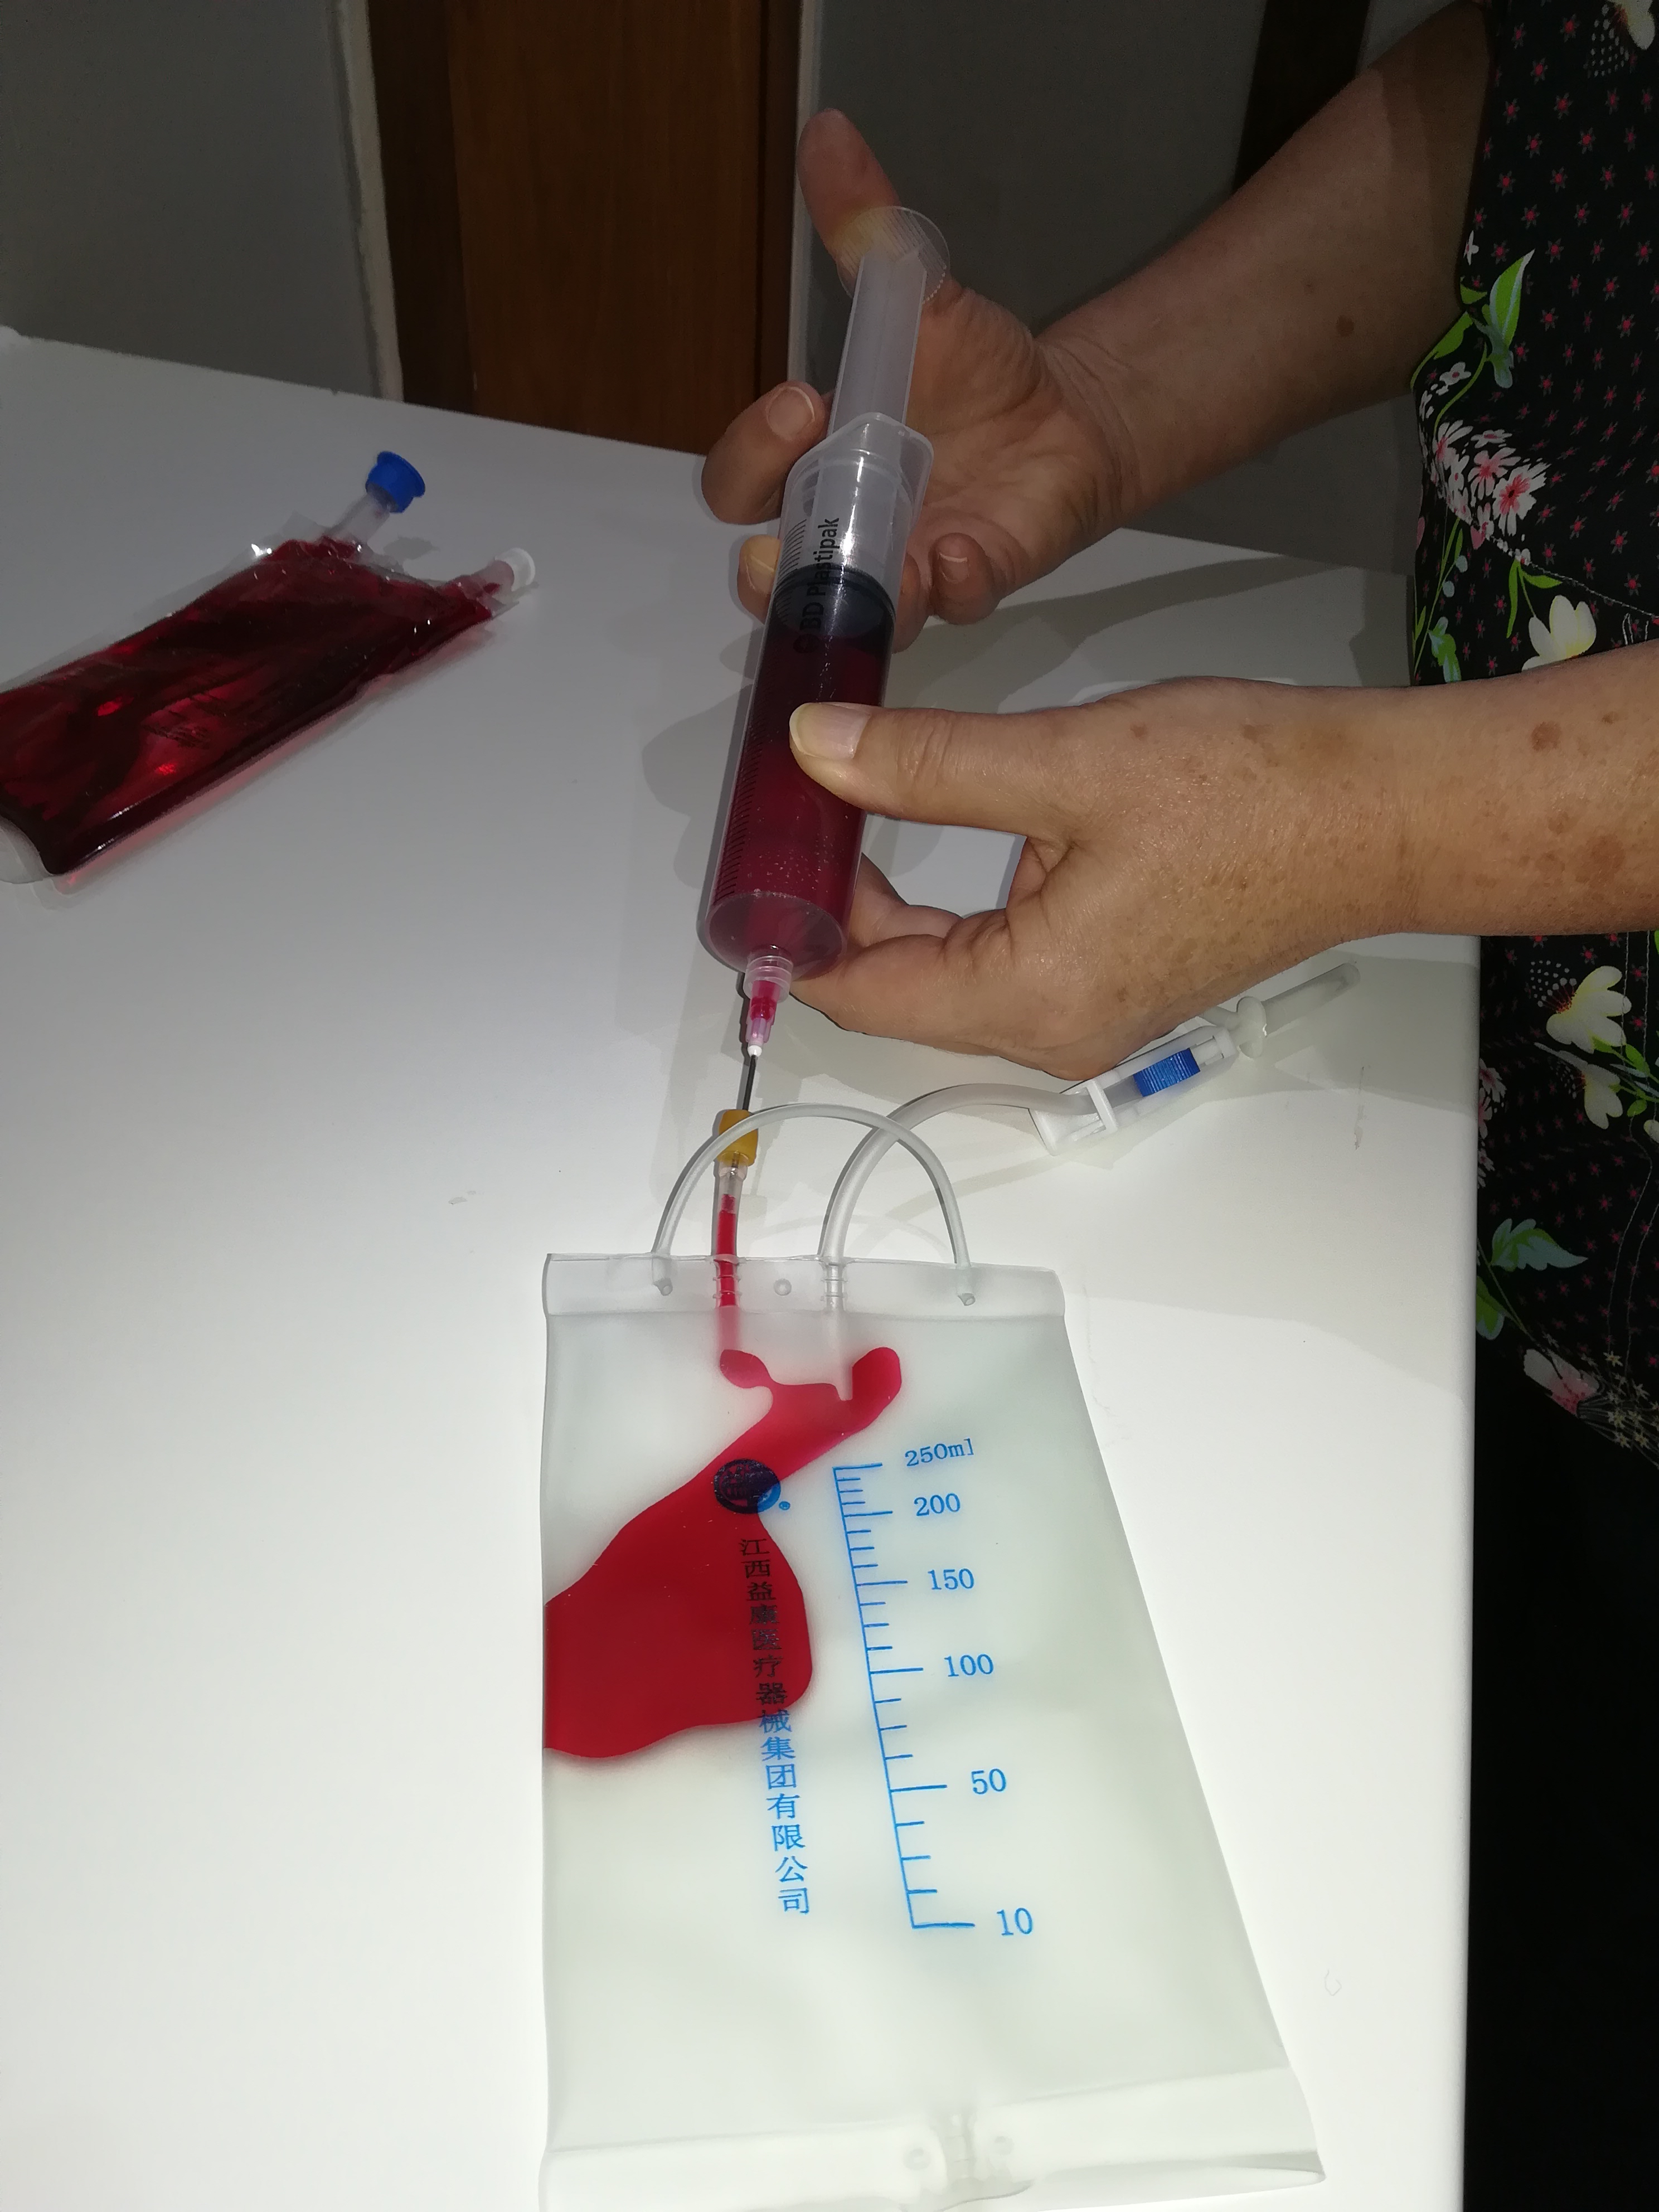
Figure 2 and 3: Fill the IV-bag with fluid
6. Hang the IV-bag about 15-25 cm (6-9 inches) above the work surface.
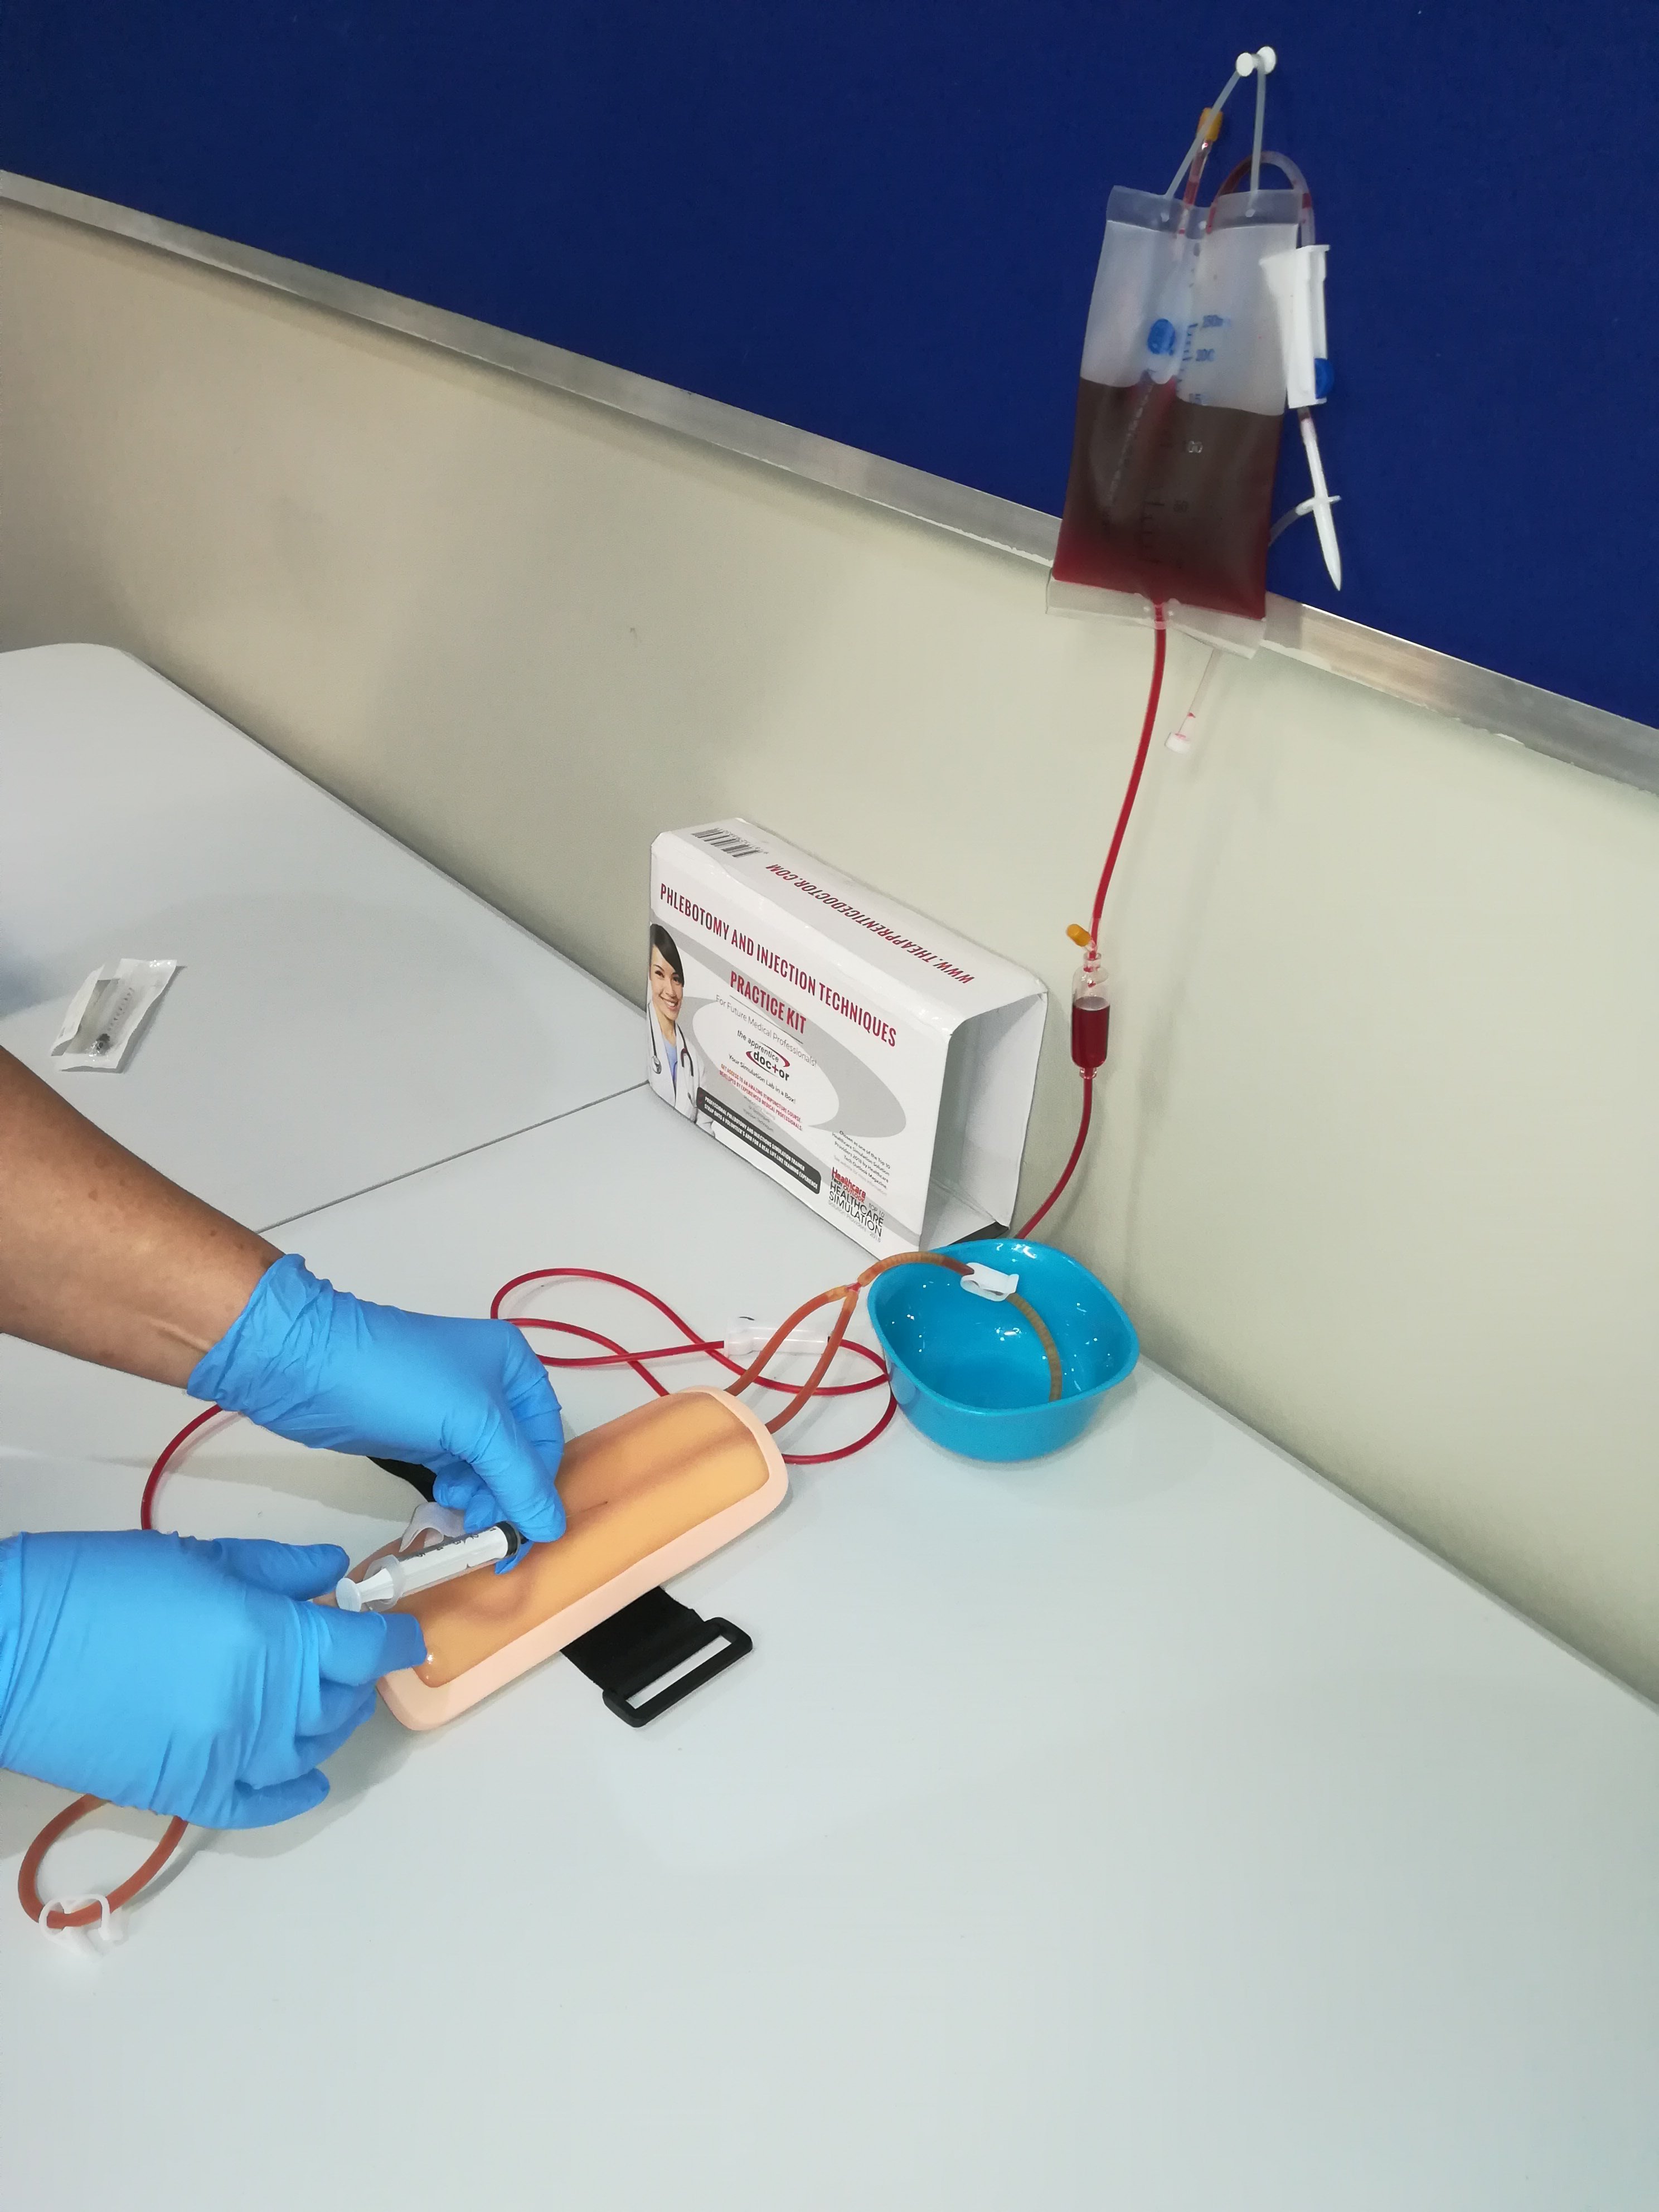
Figure 4: Hang the IV-bag above the trainer
7. Place the outflow (bottom) IV-tube in a container, for receiving any overflow of fluid.
8. Open the outflow (bottom) roller-clamp and press the drip chamber once or twice.
9. Allow the fluid to fill the IV-tube completely – then close the outflow roller-clamp.
10. Connect the IV-tube’s to one of the trainer’s tubes. (First remove the attached scalp needle if supplied).
11. Ensure that both clip-clamps of the trainer are open.
12. Place the outflow (unconnected) side of the trainer into a container for receiving any overflow.
13. Open the outflow roller-clamp and allow the fluid to fill the tubes of the trainer. Once filled close only the outflow clip-clamp of the trainer.
Important notes:
1. Keep the IV-bag inflow roller-clamp (the short tube at the top of the bag) closed at all times.
2. The bag outflow roller-clamp (the one on the long tube to the bottom of the bag) as well as the trainer pad’s inflow clip-clamp must be open during all phlebotomy training procedures. The outflow clip-clamp of the trainer should be closed.
3. The connection between the IV-tube and the pad’s tubing may or may not require the use of a connector (supplied).
4. Some IV-tubing has a filter at the end. If it gets blocked – cut it off with a scissors and reconnect.
5. Strap the trainer pad to a fellow student’s arm for a more realistic experience!
Enjoy your phlebotomy and injection pad trainer!
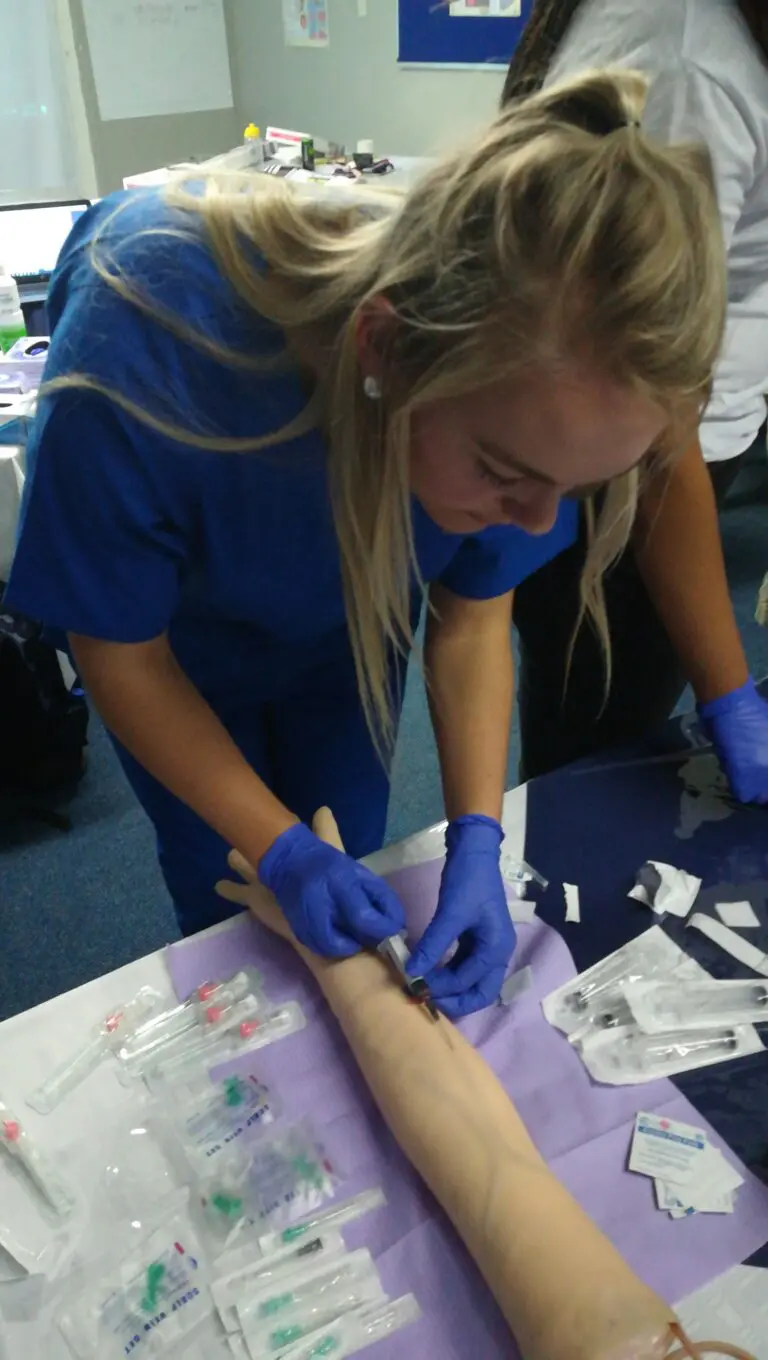
Figure 5: Practice phlebotomy techniques on the Simulation Trainer
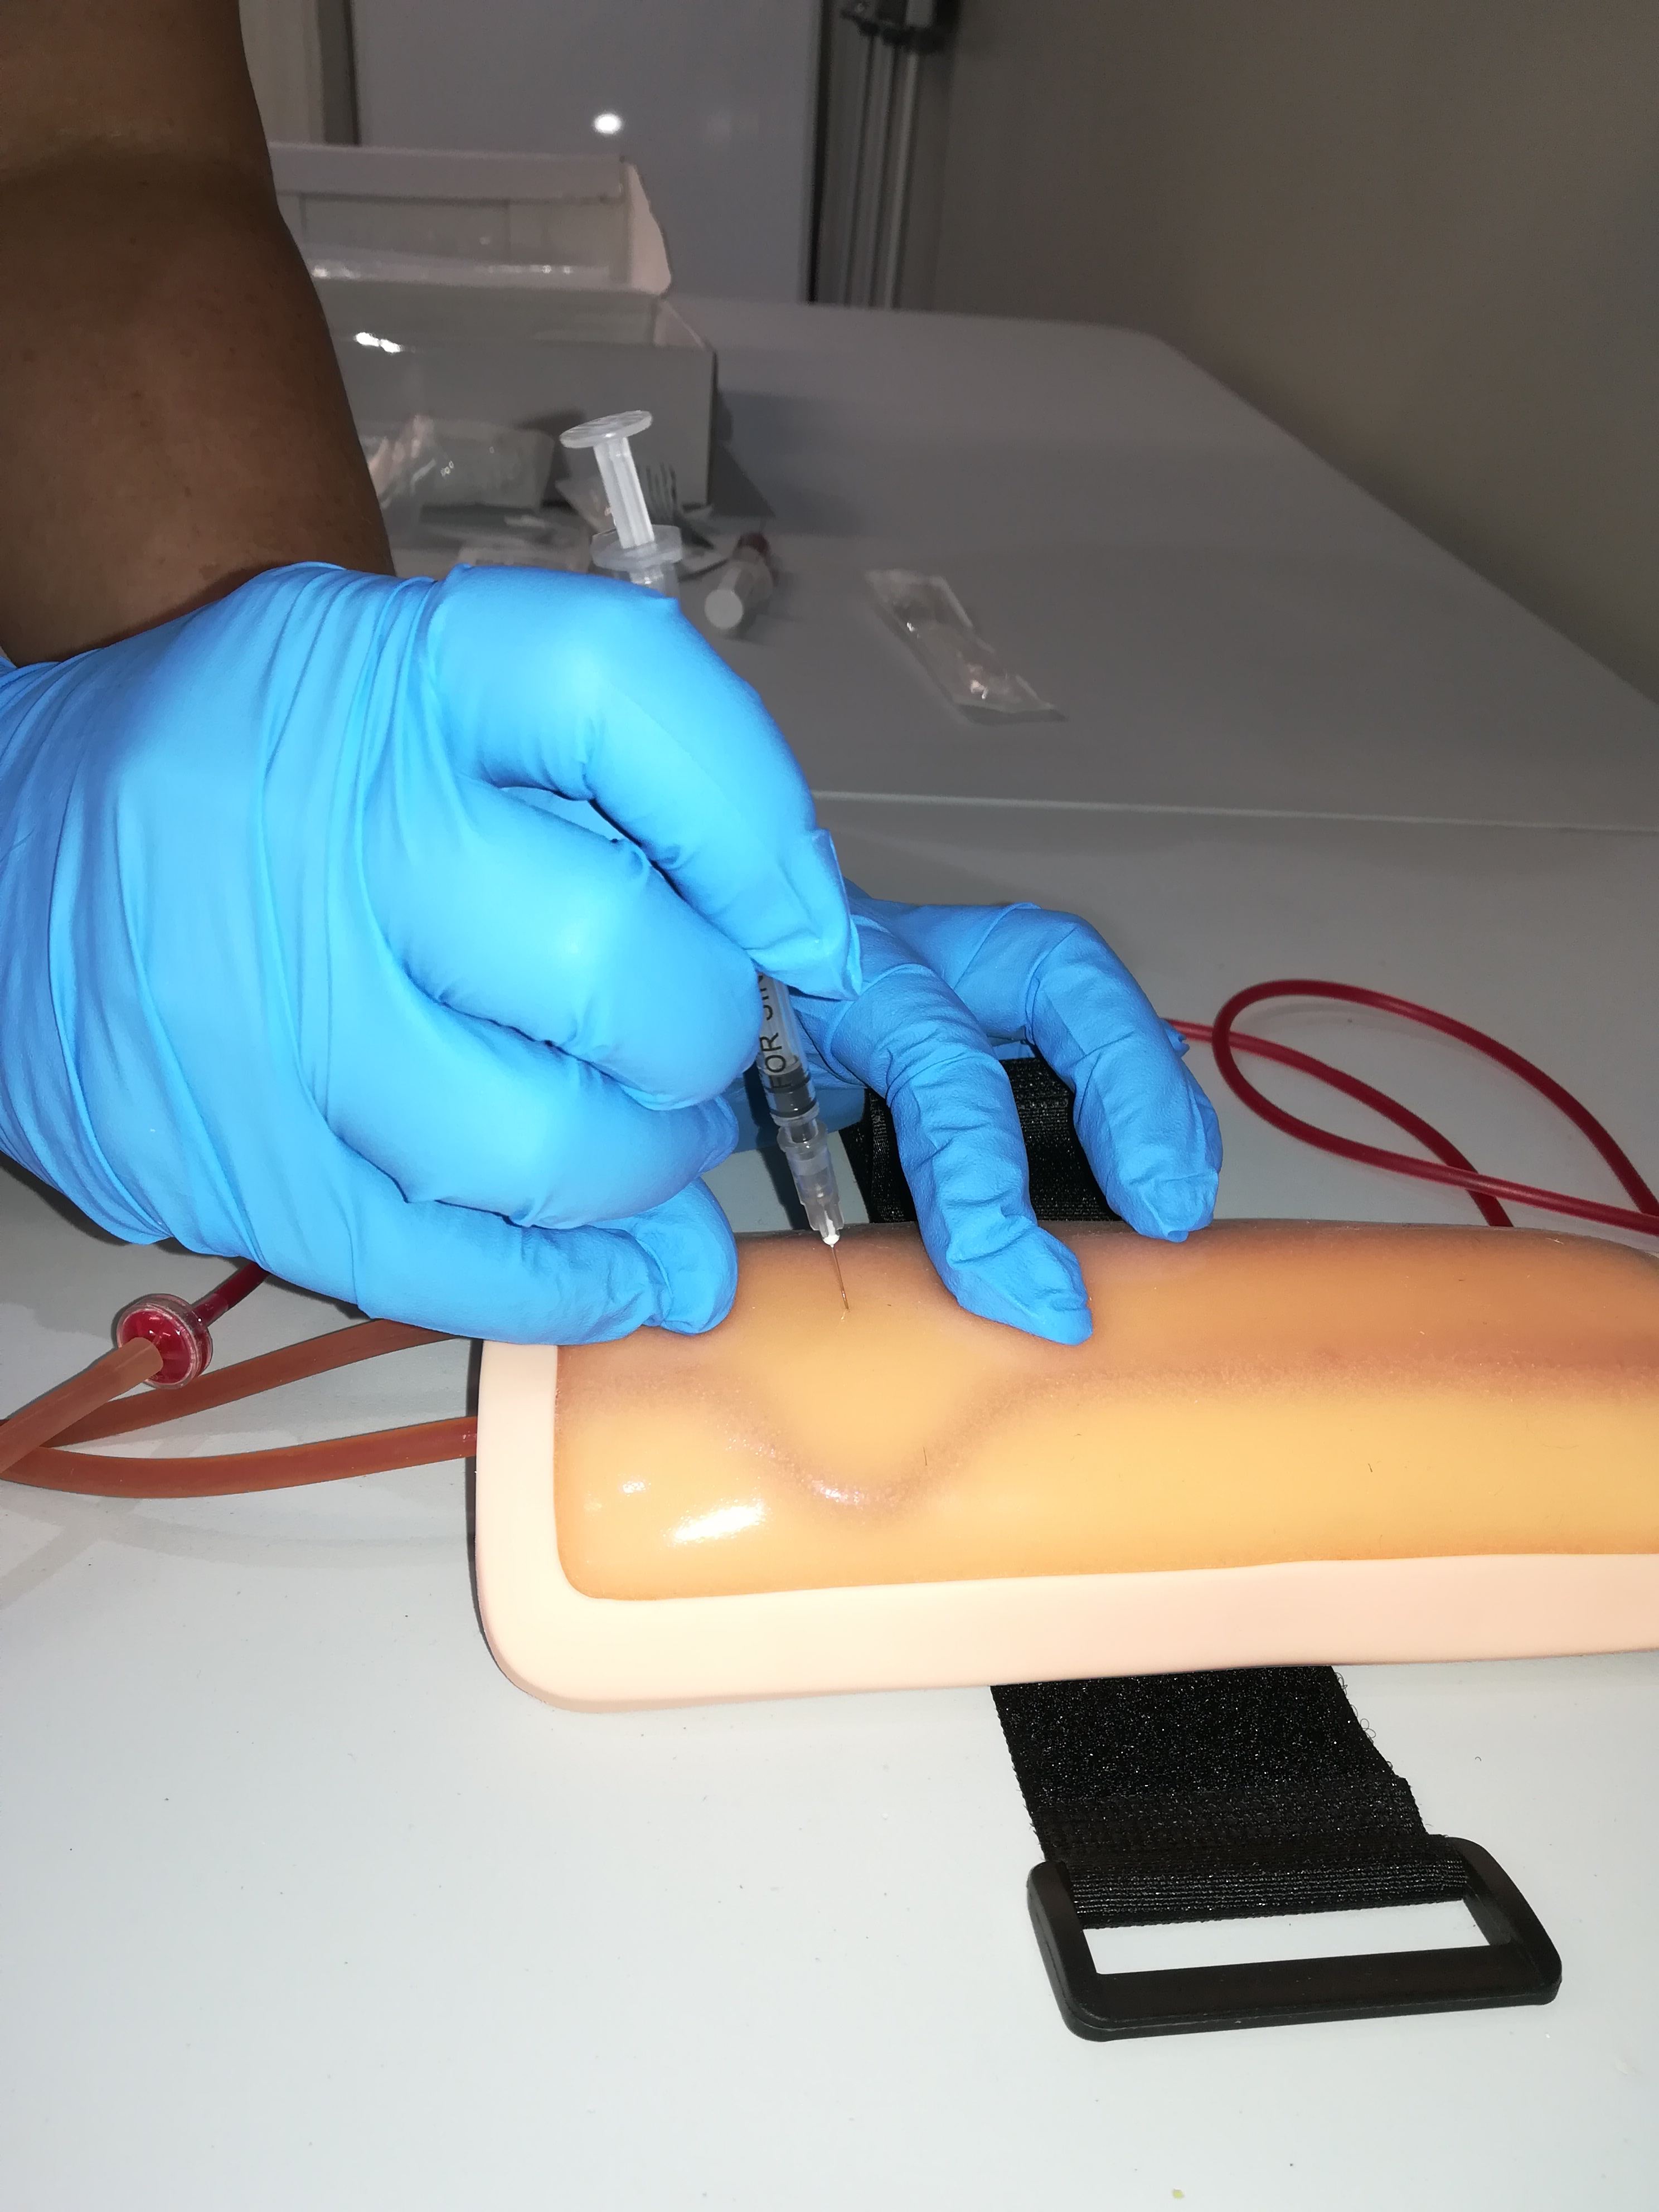
Figure 6: Practice injection techniques on the Simulation Trainer
At the end of the training practice session:
- Close the roller clamp and move to a basin. Open all clamps and allow the fluid to drain into the basin. Flush the container and tubes with water and allow the drain and dry.
- Replace the trainer pad and all items into the box.
The Apprentice Doctor® Phlebotomy Simulation Trainer will withstand hundreds if not thousands of needle sticks!
Here are some practical hints to ensure one gets maximum benefit out of the Simulation Trainer:
- Spread the needle sticks along the length of both vein-tubes. Do not over-use one specific area.
- Use smaller diameter rather than bigger diameter needles to practice. A 21G or 22 G needle will be better compared to an 18G needle for instance.
- Venous pressure is quite low and rarely exceeds 20 mmHg. To mimic this low pressure do not put the reservoir container too high above the Simulation Trainer. As little as three to six inches (8-15 cm) is quite sufficient. This will also minimize the tendency of the tubes leaking.
- The Latex tubes tend to reseal after a needle stick. After a fair amount of use the trainer will start leaking – initially very slightly so. Allow the Simulation Trainer a disuse period of 2 to 3 weeks before using it again to allow the latex tubes to reseal.
- After extensive use, the Simulation Trainer will start leaking. The Apprentice Doctor® Phlebotomy Simulation Trainers are favorably priced, thus we recommend replacing the old Simulation Trainer with a new one.
- Do not discard the old Simulation Trainer – it makes for an amazing tool for students to practice and perfect their suturing skills!
Troubleshooting checklist:
√ Double-check that you followed all the instructions above accurately.
√ Check if the tubes are filled with fake-blood.
√ Ensure that the roller clamp is open and that the IV-tube in this region is not kinked or stuck closed.
√ Ensure that the clip-clamp at the inflow side is open and that the tubing in the clip’s region is not kinked or stuck closed..
√ Ensure that the reservoir is elevated high enough to produce hydrostatic pressure in the fake veins.
√ If nothing helps – kindly contact us – we would like you to succeed. Some photos of the exact problem showing your trainer set up will be of great value when you Contact-us.
Complete a certified accredited complimentary Phlebotomy and IV-Skills Course!
Enter Here
 |  Click here or on photo Click here or on photo |
| The Apprentice Doctor® Venipuncture Kit compliments the Apprentice Doctor® Phlebotomy Training Pad to perfection! | Use the super-popular Apprentice Doctor® Anatomical Simulation Arm for your next Phlebotomy Workshop! |
Visit www.TheApprenticeDoctor.com/shop/ for more information or to order
(Academic and bulk order discounts may apply).
Our Phlebotomy Workshops are fun!
and
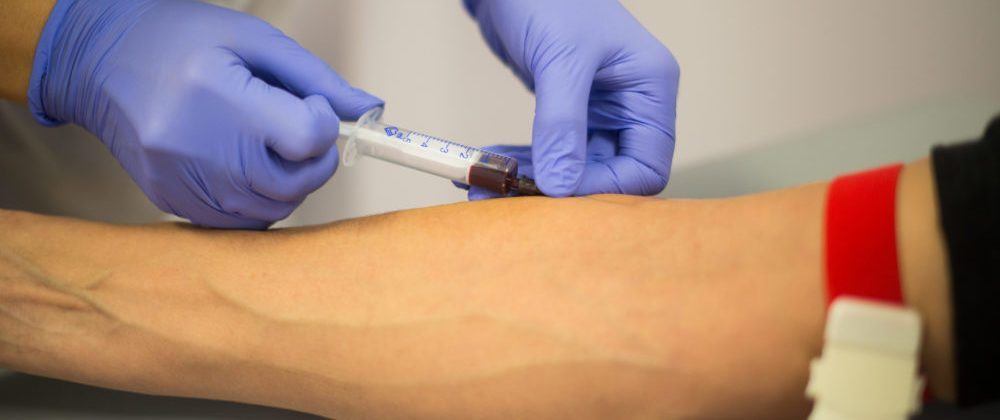
Figure 6: Prepare for performing phlebotomy in the clinical setting